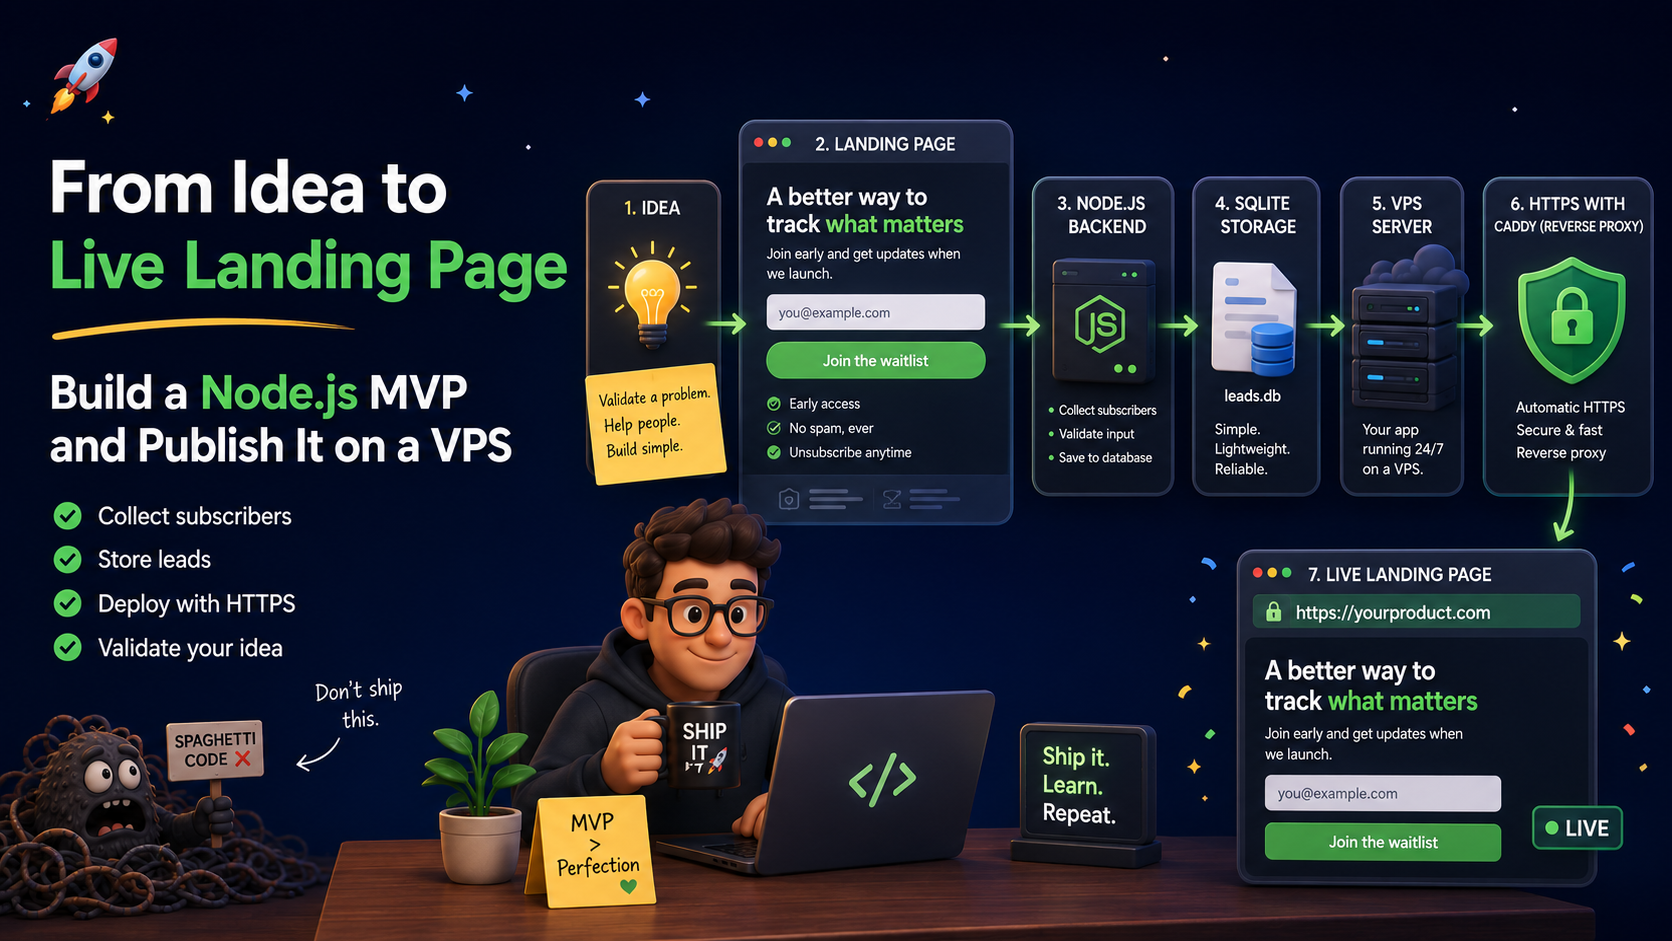
There are two types of backend projects.
The first one starts simple and stays clean.
The second one starts simple, then three weeks later you are afraid to open the routes folder because somewhere inside it there is a 900-line file called userControllerFinalNew2.js.
We are going to avoid the second one.
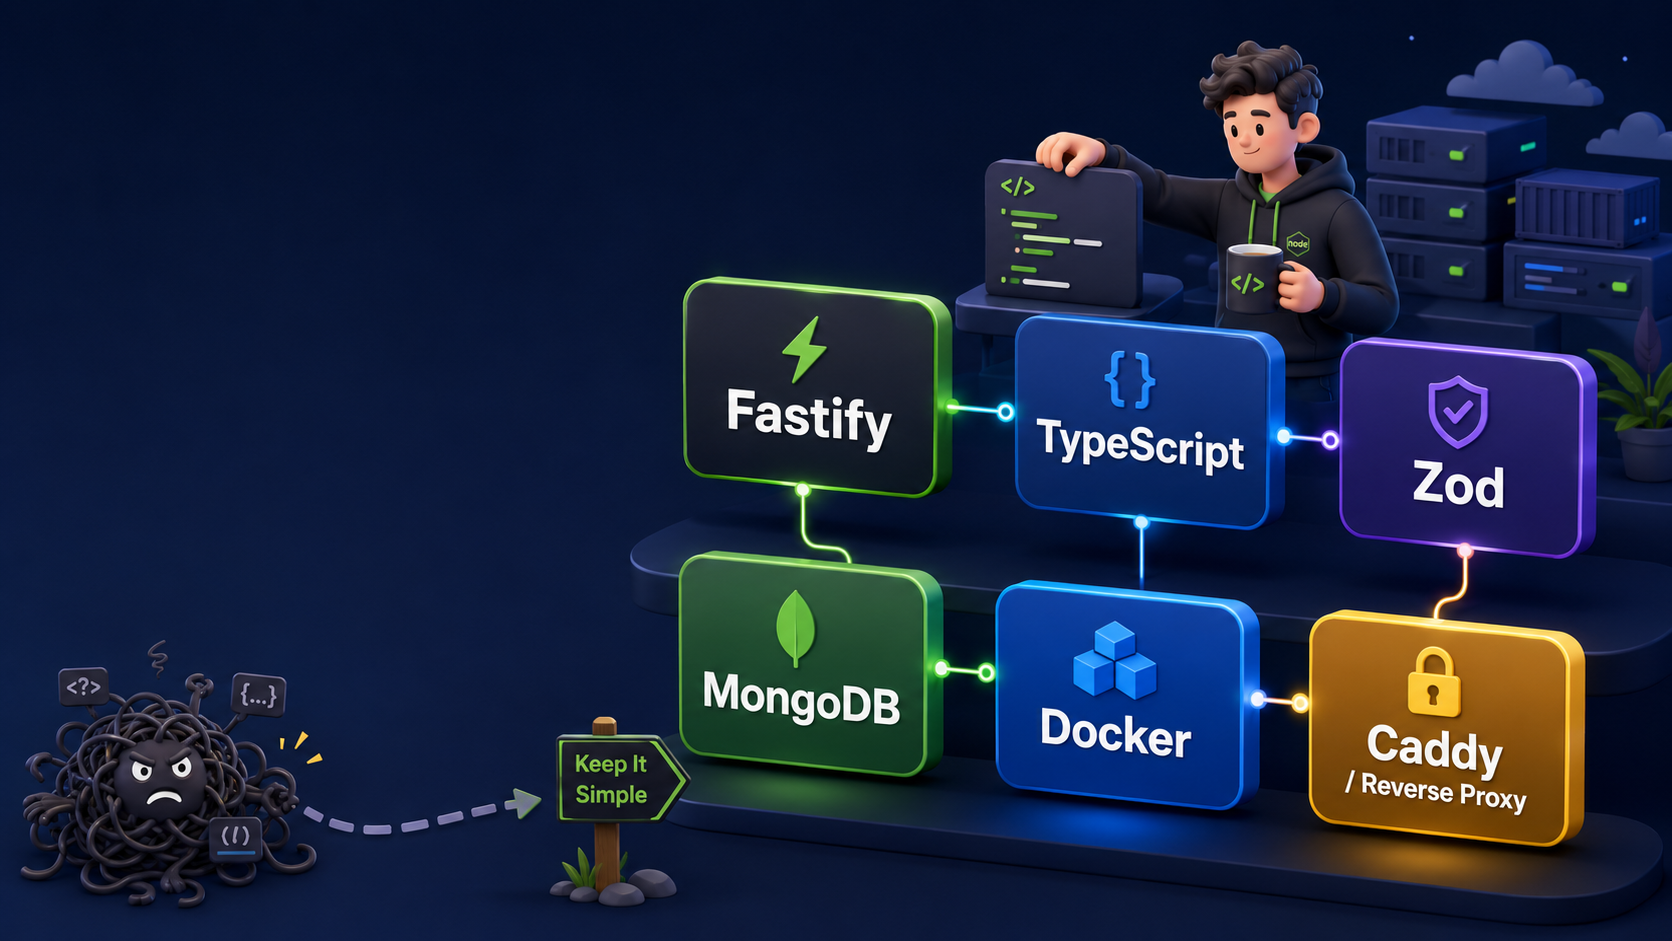
In this article, we will build a simple but modern Node.js API using:
Fastify
TypeScript
Zod
MongoDB
Mongoose
Docker
The goal is not to build a giant enterprise monster. The goal is to build a backend that is small, readable, and ready to grow without becoming spaghetti with environment variables.
Why this stack?
For years, the classic Node.js backend stack was:
Express + JavaScript + MongoDB
And honestly, Express is still fine. It is simple, mature, and everywhere.
But for a new backend API today, I prefer something a little more structured:
Fastify + TypeScript + Zod + MongoDB
Why?
Because it gives us a nice balance:
Fastify      -> fast and clean API framework
TypeScript   -> better safety and autocomplete
Zod          -> runtime validation for request data
MongoDB      -> flexible document database
Mongoose     -> schema/model layer for MongoDB
Docker       -> easy local and production deployment
In other words, it is modern without being overcomplicated.
We are not summoning a microservice dragon here. We are just building a clean API.
What we will build
We will create a simple Users API with these endpoints:
GET    /health
GET    /api/users
GET    /api/users/:id
POST   /api/users
The API will let us create and fetch users from MongoDB.
A user will look like this:
{
  "name": "Eneas",
  "email": "eneas@example.com"
}
Simple, but enough to demonstrate a clean project structure.
Final project structure
This is the structure we will use:
simple-node-api/
├─ src/
│  ├─ app.ts
│  ├─ server.ts
│  ├─ config/
│  │  ├─ env.ts
│  │  └─ db.ts
│  ├─ modules/
│  │  └─ users/
│  │     ├─ user.model.ts
│  │     ├─ user.schema.ts
│  │     ├─ user.service.ts
│  │     └─ user.routes.ts
│  └─ utils/
│     └─ AppError.ts
├─ .env
├─ .env.example
├─ package.json
├─ tsconfig.json
├─ Dockerfile
└─ docker-compose.yml
The idea is simple:
app.ts          -> creates the Fastify app
server.ts       -> starts the server
config/         -> environment and database setup
modules/users/  -> everything related to users
utils/          -> shared helper classes
This structure is small, but it scales nicely.
When you add articles, products, orders, comments, or anything else, you create a new module:
modules/articles/
modules/products/
modules/orders/
Your future self will thank you.
Step 1: Create the project
Create a new folder:
mkdir simple-node-api
cd simple-node-api
npm init -y
Install the production dependencies:
npm install fastify @fastify/cors @fastify/helmet @fastify/rate-limit mongoose zod dotenv
Install the development dependencies:
npm install -D typescript tsx @types/node
Here is what each package does:
fastify              -> API framework
@fastify/cors        -> enables CORS
@fastify/helmet      -> adds security headers
@fastify/rate-limit  -> basic rate limiting
mongoose             -> MongoDB models
zod                  -> validation
dotenv               -> loads environment variables
typescript           -> TypeScript compiler
tsx                  -> runs TypeScript directly in development
@types/node          -> Node.js TypeScript types
Step 2: Configure package.json
Update your package.json:
{
  "name": "simple-node-api",
  "version": "1.0.0",
  "type": "module",
  "scripts": {
    "dev": "tsx watch src/server.ts",
    "build": "tsc",
    "start": "node dist/server.js"
  },
  "dependencies": {
    "@fastify/cors": "^11.0.0",
    "@fastify/helmet": "^13.0.0",
    "@fastify/rate-limit": "^10.0.0",
    "dotenv": "^17.0.0",
    "fastify": "^5.0.0",
    "mongoose": "^8.0.0",
    "zod": "^4.0.0"
  },
  "devDependencies": {
    "@types/node": "^24.0.0",
    "tsx": "^4.0.0",
    "typescript": "^5.0.0"
  }
}
The important scripts are:
npm run dev      -> development mode
npm run build    -> compile TypeScript
npm start        -> run compiled JavaScript
Step 3: Add TypeScript config
Create tsconfig.json:
{
  "compilerOptions": {
    "target": "ES2022",
    "module": "NodeNext",
    "moduleResolution": "NodeNext",
    "outDir": "dist",
    "rootDir": "src",
    "strict": true,
    "esModuleInterop": true,
    "skipLibCheck": true
  },
  "include": ["src"]
}
This tells TypeScript:
Source code lives in src/
Compiled code goes to dist/
Use strict type checking
Use modern Node.js module behavior
Step 4: Environment variables
Create .env.example:
NODE_ENV=development
PORT=3000
MONGODB_URI=mongodb://localhost:27017/simple_api
Then create your real .env file:
NODE_ENV=development
PORT=3000
MONGODB_URI=mongodb://localhost:27017/simple_api
Never commit real production secrets to Git.
The .env.example file is safe to commit because it shows the required variables without exposing real secrets.
Step 5: Validate environment variables with Zod
Create:
src/config/env.ts
import "dotenv/config";
import { z } from "zod";

const envSchema = z.object({
  NODE_ENV: z.enum(["development", "production", "test"]).default("development"),
  PORT: z.coerce.number().default(3000),
  MONGODB_URI: z.string().min(1, "MONGODB_URI is required")
});

export const env = envSchema.parse(process.env);
This is one of the small things that makes the project feel professional.
Instead of discovering missing environment variables after two hours of debugging, the app fails immediately with a clear error.
Without validation, your app says:
Cannot read properties of undefined
With validation, your app says:
MONGODB_URI is required
That is a better conversation.
Step 6: Connect to MongoDB
Create:
src/config/db.ts
import mongoose from "mongoose";
import { env } from "./env.js";

export async function connectDb() {
  await mongoose.connect(env.MONGODB_URI);
  console.log(`MongoDB connected: ${env.MONGODB_URI}`);
}
This function connects our API to MongoDB.
In a real production app, you may not want to print the full database URI if it includes a username and password. For this simple local project, it is okay.
Step 7: Create a reusable AppError class
Create:
src/utils/AppError.ts
export class AppError extends Error {
  statusCode: number;

  constructor(message: string, statusCode = 500) {
    super(message);
    this.statusCode = statusCode;
  }
}
This lets us throw clean application errors like:
throw new AppError("User not found", 404);
Instead of manually building error responses everywhere.
Small detail, big difference.
Step 8: Create the User model
Create:
src/modules/users/user.model.ts
import mongoose from "mongoose";

const userSchema = new mongoose.Schema(
  {
    name: {
      type: String,
      required: true,
      trim: true
    },
    email: {
      type: String,
      required: true,
      unique: true,
      lowercase: true,
      trim: true
    }
  },
  {
    timestamps: true
  }
);

export const User = mongoose.model("User", userSchema);
This creates a MongoDB model called User.
Each user has:
name
email
createdAt
updatedAt
The timestamps: true option automatically adds createdAt and updatedAt.
Because nobody wants to manually update timestamps like it is 2009.
Step 9: Create the validation schema
Create:
src/modules/users/user.schema.ts
import { z } from "zod";

export const createUserSchema = z.object({
  name: z.string().min(2),
  email: z.string().email()
});

export type CreateUserInput = z.infer<typeof createUserSchema>;
This does two things:
First, it validates incoming request data.
Second, it gives us a TypeScript type automatically:
CreateUserInput
So we do not write validation in one place and types in another place.
One schema. Two benefits.
Nice.
Step 10: Create the User service
Create:
src/modules/users/user.service.ts
import { User } from "./user.model.js";
import { CreateUserInput } from "./user.schema.js";
import { AppError } from "../../utils/AppError.js";

export async function createUser(input: CreateUserInput) {
  const existingUser = await User.findOne({ email: input.email });

  if (existingUser) {
    throw new AppError("User with this email already exists", 409);
  }

  return User.create(input);
}

export async function getUsers() {
  return User.find().sort({ createdAt: -1 });
}

export async function getUserById(id: string) {
  const user = await User.findById(id);

  if (!user) {
    throw new AppError("User not found", 404);
  }

  return user;
}
The service contains the business logic.
The routes should not know too much.
The routes receive HTTP requests.
The service handles the work.
This keeps the code cleaner as the app grows.
Step 11: Create the User routes
Create:
src/modules/users/user.routes.ts
import { FastifyInstance } from "fastify";
import { z } from "zod";
import { createUser, getUserById, getUsers } from "./user.service.js";
import { createUserSchema } from "./user.schema.js";

export async function userRoutes(app: FastifyInstance) {
  app.get("/users", async () => {
    return getUsers();
  });

  app.get("/users/:id", async (request) => {
    const paramsSchema = z.object({
      id: z.string()
    });

    const { id } = paramsSchema.parse(request.params);

    return getUserById(id);
  });

  app.post("/users", async (request, reply) => {
    const body = createUserSchema.parse(request.body);

    const user = await createUser(body);

    return reply.code(201).send(user);
  });
}
These routes are intentionally thin.
They validate input, call the service, and return the response.
That is exactly what we want.
Step 12: Create the Fastify app
Create:
src/app.ts
import Fastify from "fastify";
import cors from "@fastify/cors";
import helmet from "@fastify/helmet";
import rateLimit from "@fastify/rate-limit";
import { ZodError } from "zod";
import { AppError } from "./utils/AppError.js";
import { userRoutes } from "./modules/users/user.routes.js";

export async function buildApp() {
  const app = Fastify({
    logger: true
  });

  await app.register(cors, {
    origin: true
  });

  await app.register(helmet);

  await app.register(rateLimit, {
    max: 100,
    timeWindow: "1 minute"
  });

  app.get("/health", async () => {
    return {
      status: "ok",
      uptime: process.uptime()
    };
  });

  await app.register(userRoutes, {
    prefix: "/api"
  });

  app.setErrorHandler((error, request, reply) => {
    if (error instanceof ZodError) {
      return reply.code(400).send({
        message: "Validation error",
        errors: error.issues
      });
    }

    if (error instanceof AppError) {
      return reply.code(error.statusCode).send({
        message: error.message
      });
    }

    request.log.error(error);

    return reply.code(500).send({
      message: "Internal server error"
    });
  });

  return app;
}
This file is where the API comes together.
We register:
CORS
Helmet security headers
Rate limiting
Health endpoint
User routes
Central error handler
The /health endpoint is very useful for servers, Docker, uptime checks, and your own sanity.
You can visit:
http://localhost:3000/health
and quickly know if the API is alive.
Sometimes that is all we need before coffee.
Step 13: Start the server
Create:
src/server.ts
import { buildApp } from "./app.js";
import { connectDb } from "./config/db.js";
import { env } from "./config/env.js";

async function start() {
  await connectDb();

  const app = await buildApp();

  await app.listen({
    host: "0.0.0.0",
    port: env.PORT
  });
}

start().catch((error) => {
  console.error(error);
  process.exit(1);
});
This file does only three things:
Connect to database
Build the app
Start listening
That separation is clean.
The app creation lives in app.ts.
The boot process lives in server.ts.
Step 14: Run locally
Start MongoDB locally first, or use Docker later.
Then run:
npm run dev
You should see something like:
MongoDB connected: mongodb://localhost:27017/simple_api
Server listening at http://0.0.0.0:3000
Test the health endpoint:
curl http://localhost:3000/health
Expected response:
{
  "status": "ok",
  "uptime": 12.345
}
Create a user:
curl -X POST http://localhost:3000/api/users \
  -H "Content-Type: application/json" \
  -d '{"name":"Eneas","email":"eneas@example.com"}'
Get all users:
curl http://localhost:3000/api/users
If you send invalid data:
curl -X POST http://localhost:3000/api/users \
  -H "Content-Type: application/json" \
  -d '{"name":"A","email":"not-an-email"}'
You should get a validation error.
That is Zod doing its job.
A tiny guardian at the API gate.
Step 15: Add Docker
Now let us make the app Docker-ready.
Create:
Dockerfile
FROM node:24.18.0-alpine AS build

WORKDIR /usr/src/app

COPY package*.json ./

RUN npm install

COPY tsconfig.json ./
COPY src ./src

RUN npm run build


FROM node:24.18.0-alpine AS production

WORKDIR /usr/src/app

ENV NODE_ENV=production

COPY package*.json ./

RUN npm install --omit=dev

COPY --from=build /usr/src/app/dist ./dist

EXPOSE 8080

CMD ["node", "dist/server.js"]
This is a multi-stage Dockerfile.
The first stage builds the TypeScript project.
The second stage runs only the compiled production app.
That means the final production container is cleaner.
Step 16: Add Docker Compose
Create:
docker-compose.yml
services:
  api:
    container_name: simple_node_api
    build: .
    ports:
      - "3000:8080"
    env_file:
      - .env
    depends_on:
      - mongo
    restart: unless-stopped

  mongo:
    container_name: simple_node_api_db
    image: mongo:8.0
    restart: unless-stopped
    volumes:
      - mongodb_data:/data/db

volumes:
  mongodb_data:
For Docker, update your .env:
NODE_ENV=production
PORT=8080
MONGODB_URI=mongodb://mongo:27017/simple_api
This is very important.
Inside Docker Compose, MongoDB is not reached through localhost.
The Mongo service is called:
mongo
So the database URI must be:
mongodb://mongo:27017/simple_api
If you use localhost inside the API container, the app will look for MongoDB inside itself.
And then it will cry.
And then you will cry.
Use the service name.
Step 17: Run with Docker
Start everything:
docker compose up --build
Open:
http://localhost:3000/health
The browser should show:
{
  "status": "ok",
  "uptime": 10.123
}
Create a user:
curl -X POST http://localhost:3000/api/users \
  -H "Content-Type: application/json" \
  -d '{"name":"Eneas","email":"eneas@example.com"}'
Get users:
curl http://localhost:3000/api/users
Stop everything:
docker compose down
Stop everything but keep database data:
docker compose down
Stop everything and delete database volume:
docker compose down -v
Be careful with -v.
That deletes the MongoDB volume.
In production, that is the command equivalent of throwing your database into the sea.
Why port 8080 inside Docker?
In production, I like running backend containers internally on port 8080.
For example:
api container -> 8080
Caddy/Nginx   -> public 80 and 443
The public internet talks to the reverse proxy:
Internet -> Caddy -> API container
The API itself does not need to expose a public port directly.
That is cleaner and safer.
A production setup may look like this:
https://api.example.com -> Caddy -> api:8080
Inside Docker, many services can use 8080 because each container has its own network namespace.
So this is fine:
users_api:8080
admin_api:8080
blog_api:8080
They do not conflict because they are different containers.
The reverse proxy decides where traffic goes.
What makes this project modern?
This API is small, but it already has several good practices:
TypeScript for safer code
Zod for request validation
Central error handling
Environment validation
Modular folder structure
MongoDB models with Mongoose
Health endpoint
Docker support
No public database port
It is not complicated, but it is not messy either.
That is the sweet spot.
What I would add next
For a real production app, I would add:
Authentication
Refresh tokens
Role-based permissions
OpenAPI/Swagger documentation
Request logging
Automatic database backups
Pagination
Testing
CI/CD deployment
Docker log rotation
Rate limiting per route
File upload handling
But I would not add everything on day one.
A backend should grow like a tree, not like an explosion.
Start clean.
Add what you need.
Keep the structure understandable.
Final thoughts
A good backend API does not need to be huge.
It needs to be:
clear
predictable
validated
structured
easy to deploy
easy to debug
This Fastify + TypeScript + Zod + MongoDB setup gives us exactly that.
It is simple enough for a small project, but structured enough to become something bigger.
And most importantly, when you come back to the code three months later, you will not feel like you are reading an ancient curse written by your past self.
That alone is worth it.
Happy coding.